Namecheap Domain with AWS
This post won’t be an exhaustive account of domain name mapping from Namecheap to every AWS product. I will document what has worked for me for websites bought from Namecheap and hosted on Amazon S3 and AWS Elastic Beanstalk.
However, I think the process is more or less the same for other AWS products. So, without further ado, let’s get started.
AWS Elastic Beanstalk
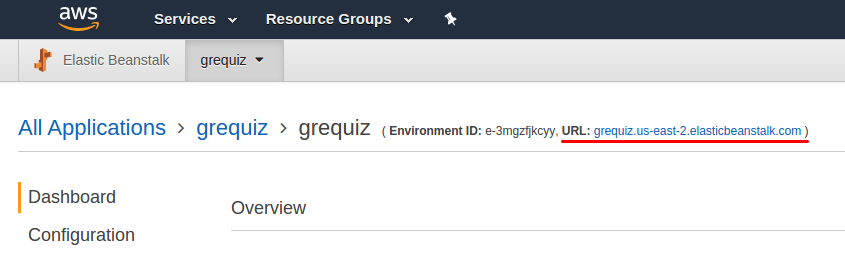
In your Elastic Beanstalk application, find your environment’s endpoint.
Skip the next section and follow the instructions in the Namecheap section below.
Amazon S3
I assume you have already created a bucket on Amazon S3, configured it for website hosting, and have your website files in it. If you haven’t, there are plenty of tutorials on the web to guide you and the official documentation for Amazon S3 is also very good.
In your bucket, under the Properties tab, click on Static website hosting.
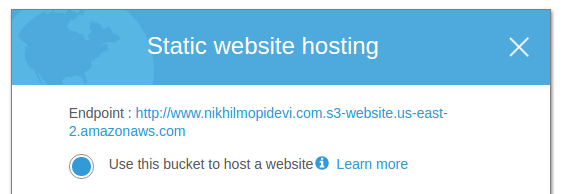
You should find the endpoint of your bucket there. Now copy that link.
Namecheap
Head over to namecheap.com and open the Advanced DNS tab of your registered domain.

You will find your host records in this section.
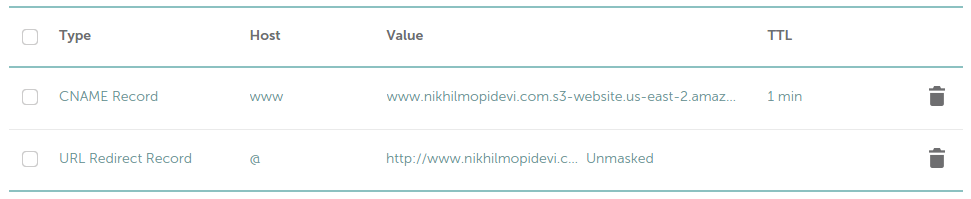
If it isn’t present already, create a CNAME Record, and update it with the following values:
Host: www
Value: <your endpoint URL>
Similarly, create a URL Redirect Record if not present, and fill in the following values:
Host: @
Value: http://www.<your domain>/
My website is at www.nikhilmopidevi.com. So, I input http://www.nikhilmopidevi.com in the Value section. In the same way, enter your domain name in that value box.
That’s it. Allow some time for DNS propagation. In most cases, it doesn’t take more than ten minutes. After which, your website should be up and running.